Install the tracking script
The tracking script is the only required setup step. It captures visits, ad clicks and form submissions, and ties them to the contacts your other integrations send in.
-
In Klarvyn, go to Settings → Install (in the Tracking group).
-
Under Serve the tracker from, keep the default —
t.klarvyn.com, hosted by Klarvyn — which needs no DNS setup: paste the snippet and you’re live.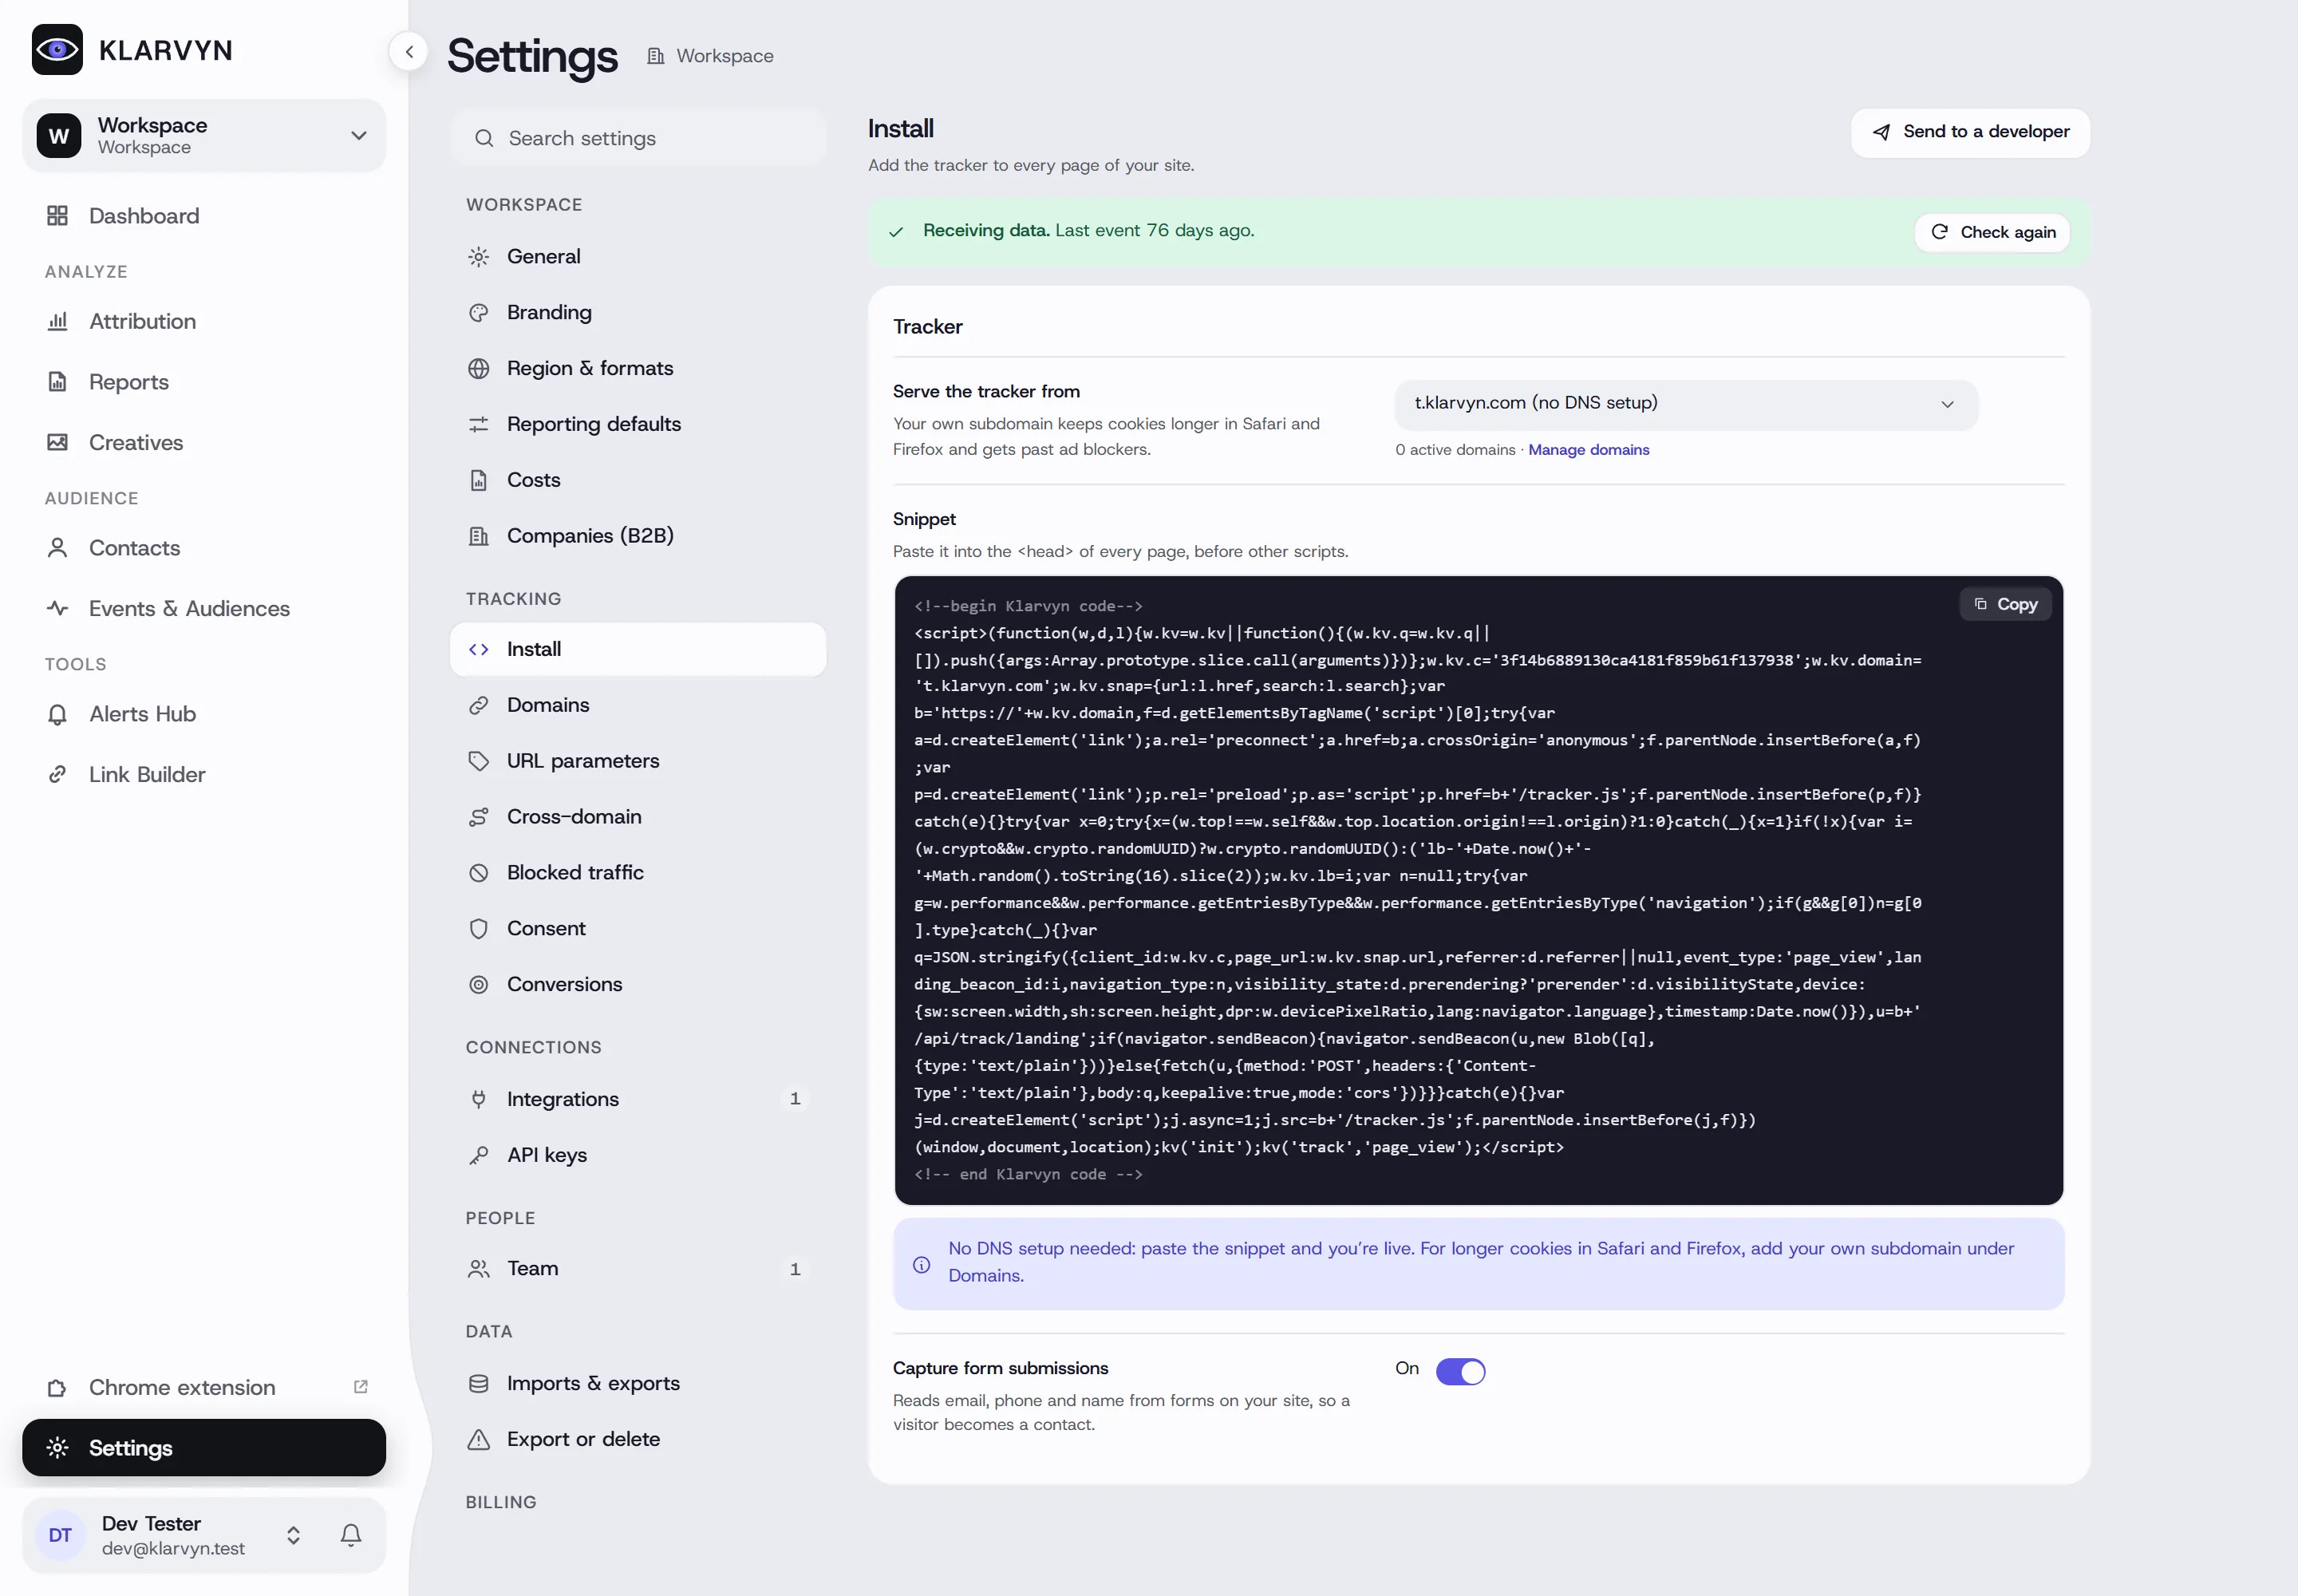
-
Click Copy and paste the snippet into the
<head>of every page of your website — or once in your site-wide template, theme or tag manager. Someone else runs the site? Send to a developer emails them the snippet and instructions. -
Visit your own website. The status line at the top of the Install page turns to Receiving data — click Check again if it hasn’t updated. You can also watch visits arrive in Events & Audiences → Events → Live.
The Install page also has Capture form submissions: when it’s on, the tracker picks up the email, phone and name people type into forms on your site, so leads become contacts without any form integration.
Recommended for production: your own tracking domain
Section titled “Recommended for production: your own tracking domain”For production-grade Safari/Firefox cookie persistence and ad-blocker resistance, serve the tracker from your own subdomain instead of the shared default:
-
Go to Settings → Domains and click Add domain (e.g.
t.yourcompany.com).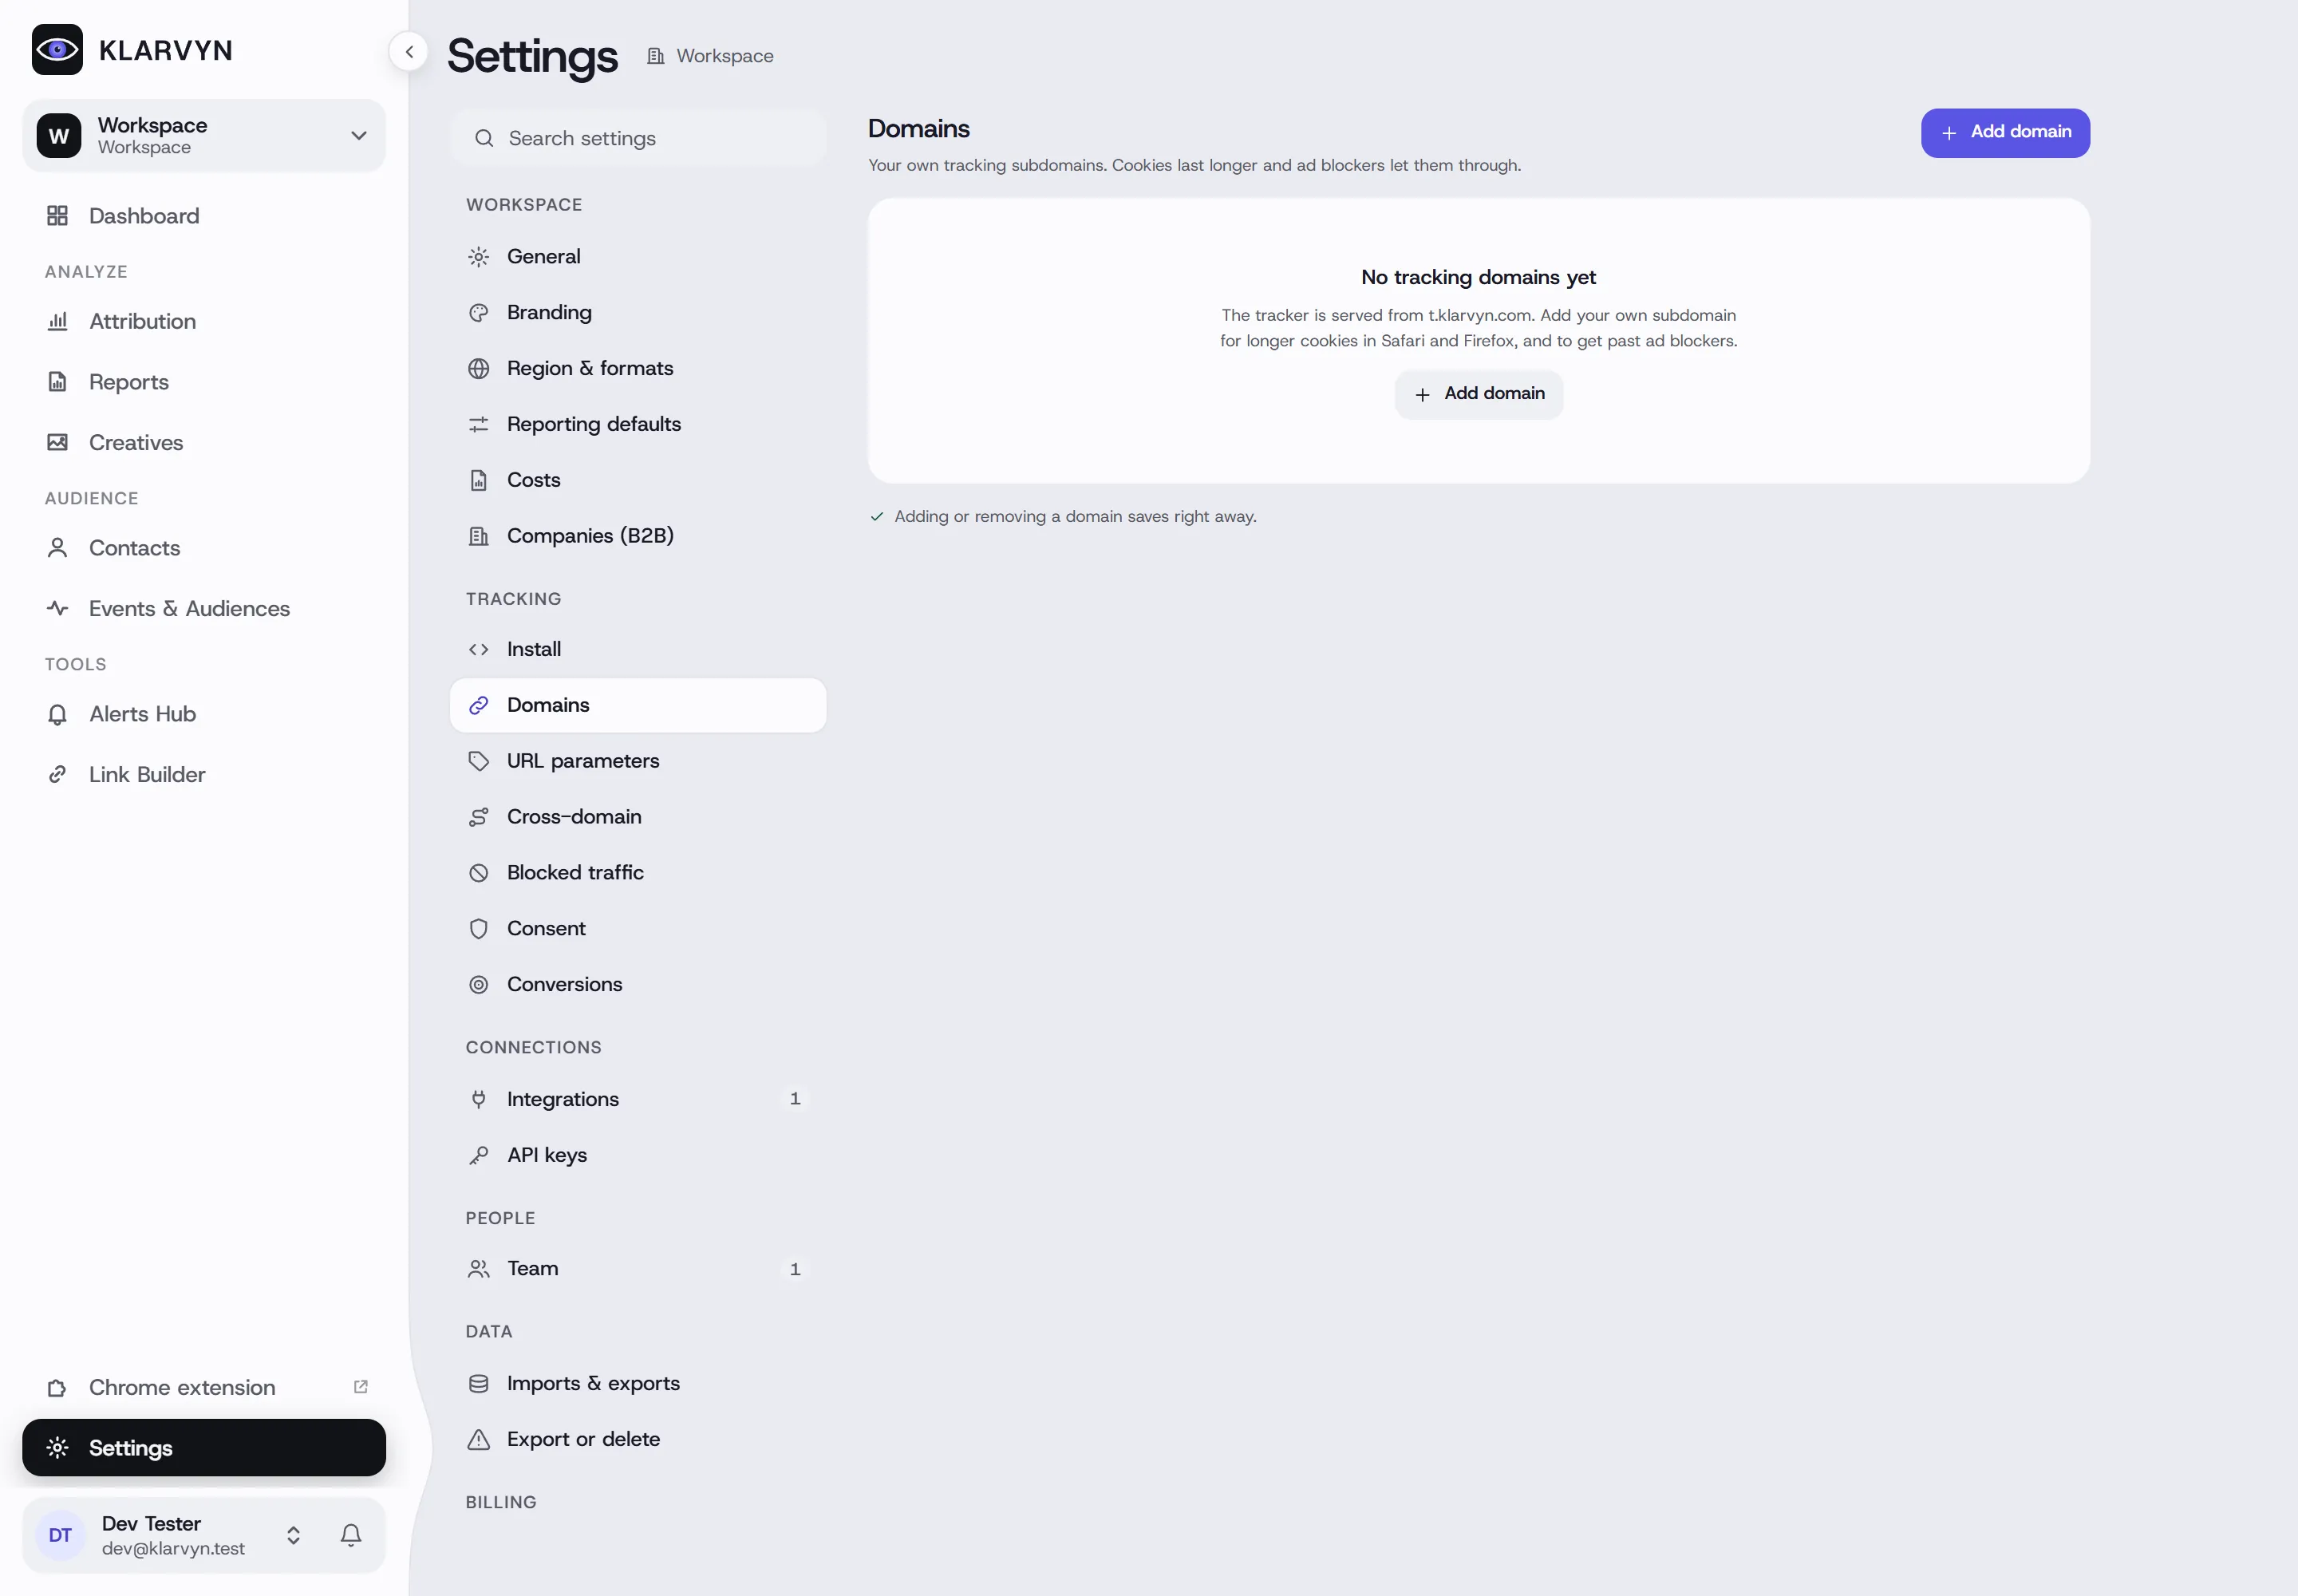
-
Add the CNAME record you’re shown at your DNS provider, then click Verify DNS. On Cloudflare, set the record to DNS only (grey cloud).
-
Switch Serve the tracker from on the Install page to your new domain (or click Make primary on Domains), then re-copy the snippet.
Custom tracking domains are part of the paid plans — during a trial, use
t.klarvyn.com.
Platform notes
Section titled “Platform notes”- Shopify / WordPress / Webflow: paste the snippet in the theme’s global
<head>section — no plugin needed. On Shopify, the Klarvyn app adds it for you. - HubSpot forms are captured automatically once the script is installed; no HubSpot-side setup required — see Track HubSpot forms.
- Consent: the tracker is consent-aware (GDPR / CCPA / LGPD) and won’t set identifiers before your consent tool allows it. Configure the behavior under Settings → Consent.